Wednesday, September 10, 2008

Classic Cardi

this is my go-to pattern for making sweaters for babies or toddlers. it is a very simple design but i think that is what makes it most attractive to me. it is versatile, can be either boy or girl, flatters many types of yarn, is easy to adjust gauge with and quite frankly i think it looks classy, hence the name.


this pattern is for personal or charity use only. not for retail sales (small scale craft booths/fairs ok as long as i get credit for pattern) DO NOT sell pattern for any reason, it is to remain free. i retain the copyrights to this pattern, do not use photos, do not copy to any other website, link here.


classic cardi


sizes 6month (12 month, 18 month, 2 years)


materials:


3 (4,5,6) balls sirdar snuggly baby bamboo DK (80% bamboo 20% wool, 104 yards, 50 grams) OR
1(1, 2, 2) ball TLC baby (100% acrylic, sport weight,490 yards, 6 oz.)
size 6 straight or circular needles
size 6 DPNs (optional)
10 +/- 1/2" buttons (will depend on your gauge)
needle and thread
4 stitch markers
cable needle
2 stitch holders or spare yarn

abbreiations:

k- knit
p- purl
k2tog- knit 2 together
skp- slip 1, knit 1, pass slipped stitch over
bo- bind off
c4f- cable 4 front
m1- make 1 by picking up bar between stitches with left needle from the back and knitting into the front
pm- place marker
sm- slip marker
yo- yarn over

gauge:

in a word there is no gauge, you can do this pattern with any yarn you want and i will be leaving the directions open to any gauge by giving pattern measurements rather than row counts.
pattern:
start my making a gauge square with whatever yarn you are chosing for this project with appropriate sized needles (examples are made with sirdar baby bamboo and tlc baby)

do a little bit of math, figure out what the gauge of stitchs will be for 9 (10, 11, 12)" and proceed

cast on stitch amount is closest to 9 (10, 11, 12)" in a multiple of 4+2 (minimum of 36 stitches)

work 2x2 rib for 5 rows

time for a little more math if your total numer of stitches is divisable by 6 move on, if not knit all stitches next row spacing increases evenly to bring your total to the next number divisible by 6 (ex. total number is 52, increase 2 stitches evenly to a total of 54)

seperate for raglan pattern by taking your total number subtract 24 and divid by 6 this will be your magic number (ex. total number of 54-24=30. 30/6=5. 5 will be your magic number)

row 1 knit your magic number, place marker, p k4 p, knit your magic number, place marker, p k4 p, knit your magic number twice, place marker, p k4 p, knit your magic number, place marker, p k4 p, knit your magic number

row 2 k all k and p all p

row 3 *knit to marker, m1 before slipping marker, p c4f p, slip marker, m1* repeat *-* 3 more times, knit to end

row 4 rep row 2
row 5 knit to marker, m1 before slipping marker, p k4 p, slip marker, m1* repeat *-* 3 more times, knit to end

rep row 2-5 until the angled cable measures 5(5 1/2, 6, 6 1/2)"

on purl row *p to first k, bo k p4 k* rep *-* 3 more times, p to end

knit to bo gap, slip sleeve stitches to a holder/scrap yarn, knit back stitches to next gap, slip sleeve stitches to second holder/scrap yarn, knit remaining stitches.

knit stockinette st for 4 (5, 6, 7)"

work 5 rows of 2x2 rib. bo

sleeves
(optional to use DPNs to make it seamless, use stitch marker to note start/end for decrease rows)

attach yarn and knit stockinette for 1 inch.

work decreases row: k2, k2tog, k to last 4, skp, k2

work a decrease row every inch until sleeve measures 6 (7, 8, 9)"

work 5 rows 2x2 rib. bo with long tail. use tail to mattress stitch the seam shut being sure to sew shut bound off cable.

repeat for other sleeve

button bands

pick up and knit 3 stitches for every 4 rows up front side of cardigan with a multiple of 4+2 total stitches

work 2x2 rib for 5 rows. bo

pick up same number of stitches on opposite side

work 1 row 2x2 rib

row 2 *k2 p2 k2, k2tog yo* rep to last 6 stitches, finish in rib pattern

work 3 rows 2x2 rib. bo

weave in all ends and sew on buttons to correspond with button holes.

some baby goodies

so, i don't have a baby but i really like making baby clothes for a couple reasons... firstly they are small, so therefore quick. secondly i can use smaller amounts of yarn so i can test out new stuff... and lastly some of them are just soooo cute i can't resist. the plus side is while i don't have rugrats of my own i do have friends of childbearing age who are interested in having children so i will soon (in the next couple years) be able to rid myself of some of these extras. i have made some that i particularly like and will be keeping for that day when i do have interest in some poop machines of my own.


here is my first one, i really like this one and it will be part of my own personal stash. i am going to post the pattern here after this post, it is very simple but i like how it looks classic and is versatile. i made this one in sirdar snuggly baby bamboo (bamboo/wool blend and just heavenly) i bought 3 balls (at about 6 bucks a piece) so i could test it out and it was literally JUST enough to finish this little sweater. i added 9 gray 1/4 inch buttons.


next i have this little guy, it is made from bluemint simply soft. i had bought the yarn and made myself a tunic-y top with it but i have a 3/4 skein left and i figured i would whip up this little hoodie. it was totally inspired by this little koala zipper pull i found on sale at the local fabric store. i also bought a little dinosaur one but have yet to find the perfect project for it. it was a psurprisingly boring project but hey thats what you get when you make a stockinette project, i did add seed stitch to the edges and i added a braided piece to sinch the hood part. overall i think its cute and will go into the give away pile.


i also made this little one, but it has a home already as the lady i work for is pregnant with a girl. it is made from some tlc baby yarn and it is a 3/4 crochet version of the prest-o chang-o . i had every intention of knitting this one but it was just not working out so i just pulled out my hook and winged it. i think it came out very similar. i did knit the panels but could have crocheted them as well. it was very easy as the basic shape of the sweater is pretty boxy the body is crocheted in seed stitch and made like a big U then added the sleeves to the middle of the body U and seamed it in one piece. it took 6 1/2 inch buttons. i didnt do the panel in the original pattern just looked in my own stitch guide book.


i personally love knitting with wool, wool blends and other natural fibers (bamboo, soy, cottons etc) but i have come to the harsh conclusion that unless it is someone VERY VERY special to me, or someone i know will take gentle care i dont use natural fibers in casual gifts especially babywear. i dont trust that people will listen to the washing instructions and acrylic is just so easy wear and usually washs pretty well. so i have abided myself to being honest that if i made a lovely wool baby sweater it will be tossed in the regular wash and end up doll sized and not at all useful and since i am a realist (i watch babies for a living for geez sake.) that babies are too messy to give a wool object a very long shelflife. plus you dont have to worry about any moths eating that lovely sweater between babies fitting into it if you do the hand-me-downs. so i just keep the nice fibers for myself or others i REALLY REALLY trust. *sigh* oh well...

and speaking of natural fibers here is my current project, it is a sweater for myself. i wanted a very classic looking sweater, that when i go back to a work place, can easily go from casual errands on the weekend to looking nice and presentable in the workplace. this is being made from some reclaimed cashmere. i had found 2 very lovely and in very good shape cashmere sweaters at the thrift store by hubby's work. i bought both which set be back about 10 bucks or so. i washed and carefully unraveled both sweaters, they were a mens large or Xlarge and both were cream, same brand. they were not the exact same cream but there is enough from each to make their own sweaters/projects. this was the slightly more yellow cream and i should have enough to finish it, i really like it so far. i used shortrow shaping to pull the front neckline down a little bit in the raglan, i am doing to continue the cable/rib for a total of 6 inches (am currently at only 3 inches and about 4 inches long is looking better and better each row i do) it is very small, on size 3 needles. this is 3 weeks work for me which is totally unheard of i dont usually work with such fine yarn. the yarn was actually one of the machine knit sweaters with a lace weight so i doubled it to 2 plys of laceweight so it is somewhere around a heavy lace/light sock. i will really love this onces its done and it just fits so perfectly now as i try it on. ok ok back to my knitting and drowning in yarn, hope you like these. thanks for looking.

Tuesday, May 27, 2008

camera out of commission

so now that i have a brand spankin new camera i finally took some pictures of my finished objects over the last couple months. since i finally nailed out the pattern for the swimsuit you can see that project i finished and here are a few more things.

numero-uno my grey-gina i think it turned out very well, wish i had made the next size up as my bust circumference was really challenging my seams but other than that it is lovely and i love it, i took it on my honeymoon (oh yes i did get married in the time the camera was out of commission!) here she is...

i finally got a picture of my stargazer top (i would link but magknits is down so...) i made it out of lustersheen flamingo color, i really love the color it is like a watermelon-y pink not too barbie. it looks pretty cute on, only problem i had is the neckline curls even after blocking. i also avoided all of those pesky seams, i knitted it with not a single seam and insteam of using ribbon as the contrast band i used the half ball i had of some actual ribbon yarn and i crocheted it in seed stitch instead of knitting it to save myself a little bit of time.
then there is this little purple lillian tank i made from this pattern. it is made from some lavender colors cotton plus i had gotten on clearance long ago. it is a little bit shiny and the first time i wore it (as a vest over a white button down) i got some lovely comments from a nice old lady in a restaurant who was amazed that i, a young person, had made it myself!


lastly i made the all-season tank from the lion brand microspun, it is actualy french vanilla color not sure why it looks so grey in the picture but it is indeed more of a cream color, i really like it but for some reason the neck hole is kind of hard to get your head through, not sure if that was my fault or the pattern so anyone making it beware, try it on before you get to the end. it is totally wearable and i do like how the smallish neckhole makes a nie high sitting neckline. i am overall very happy with it. it was made from this pattern


Monday, February 11, 2008

The Pineapple Monokini


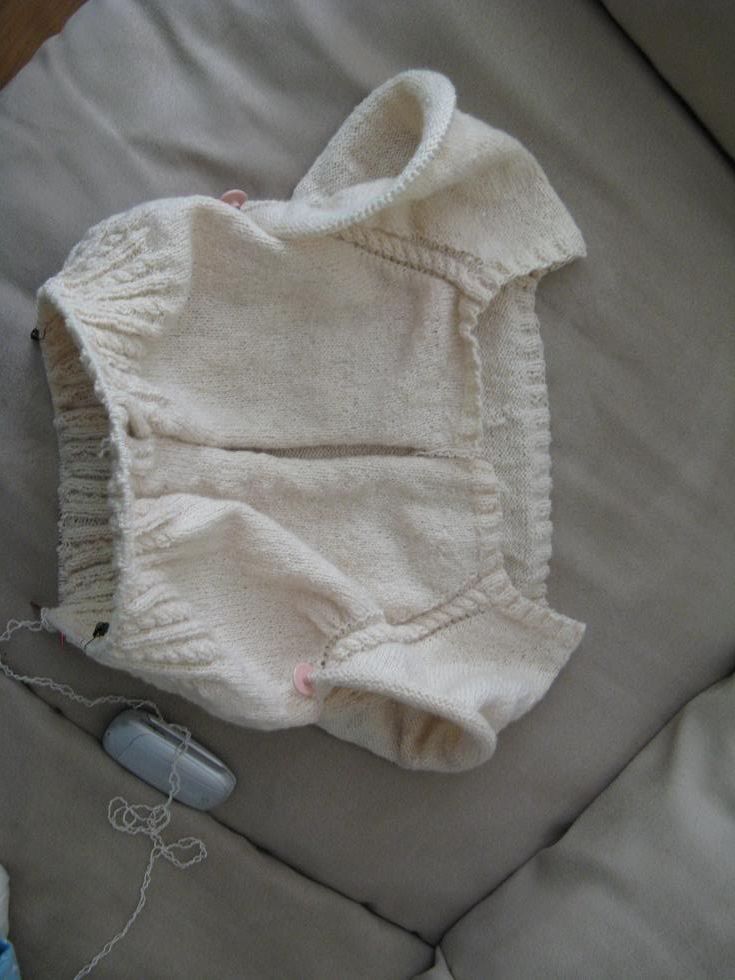
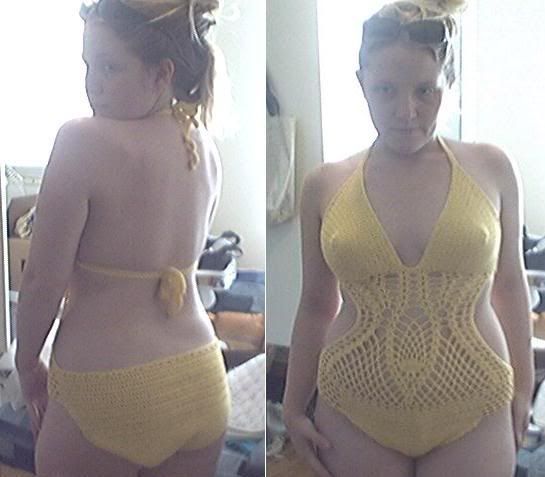
so here it is, here is the picture


i have written up an UNTESTED pattern (only made the one for myself). it is one size fits most, there is a tie back at the rib cage and the halter top so that its adjustable and there is a portion of the bottom that is easily adjustable to be slightly larger or smaller if need be, and i will mention at that point where to adjust this for the individual. this is made all in one piece with no seams to sew! yay!

SPECIAL NOTE: if you want to actually go in the water i would suggest finding some very thin nylon thread/elastic cord and making it with that as the cotton absorbs a LOT of water. i have not tried this technique but feel free to test it out and let me know how it works out for you!
I retain all copyrights to this pattern: it is not to be sold for any reason, you may sell your own finished product as long as you give credit for the design to me, free for personal use only, not for commercial use.

the pineapple monokini (totally not for water, just for looking hot!)

materials:
3 balls of cotton comfort color 16 (cascade fixation and elann esprit are also substitutable but may require more balls and gauge adjustment)
C crochet hook
1 removable stitch marker
small scraps of cotton material to line cups and crotch (optional)
stitches:
sc: single crochet
dc: double crochet
ch: chain
sc2dec: single crochet decrease over next 2 stitches (insert hook into st, yo pull through insert hook into next st, yo pull through, yo pull through all loops on hook)
ss: slip stitch
bikini:
ch 41
row 1: sc in 2nd ch from hook and each across. ch 1 turn (40sts)
row 2: sc2dec in first 2 sts, sc across to last 2 sts sc2dec ch 1 turn (38sts)
row 3-11: rep row 2 (20sts)
row 12: sc in each st across ch1 turn (20sts)
row 13: rep row 2 (18sts)
row 14-22: rep last 2 rows(10sts)
row 23-35: sc in each across ch 1 turn (10sts)
row 36: 2 sc in next st, sc across to last st, 2 sc in last. ch1 turn (12sts)
row 37: rep row 36 (14sts)
row 38: sc in each across ch 1 turn(14sts)
row 39-80: rep last 3 rows (70sts)
this is where you can adjust the size of the "bottom" by chaining more or less
ch 25, sc across the beginning chain of original 40sts place marker between st 20 and 21, ch25 ss in end st of back of brief, ch3 turn (ch3 counts as dc on back of brief)
row 81: dc in first st of ch25 *ch2 skip next 2 ch, dc in next* rep from *-* to end of ch25, dc in next 40 sts, dc in first st of ch25 rep*-* to end of ch25, dc in next 69 sts ss in top of ch3. ch3 turn
row 82: dc across next 69 sts ch1 skip next dc, dc in ch2 space, *ch2 dc in next ch2 space* rep *-* to last ch2 space, ch1 skip next dc, dc in each next 40 sts, ch1 skip next dc, dc in ch2 space rep *-* to last ch2 space, ss in top of ch3. ch3 turn
row 83: dc in ch1 space, *ch2 dc in next ch2 space* rep *-* to last ch2 space, ch2 dc in ch1 space, dc in next 40 sts, dc in ch1 space, rep *-* to last ch2 space, ch2 dc in ch1 space, dc in next 69 sts, ss in top of ch3, ch3 turn.
row 84-85: rep last 2 rows, ch5 turn for row 85
row 86: dc in same space, *skip next 2 sts dc ch1 dc in next st* rep *-* around entire brief, ss in ch3 of ch5.
(move "middle marker" to ch1 space nearest to its location)
this part will be a little tricky for the adjustment purposes, so to make sure it will still be centered correctly you need to count to 15 "V" sts from center marker, ss in each st to ch1 space of 15th Vst and continue.

row 87: ch5 (counts as dc ch2) *skip 2 dc, dc in next ch1 space, ch2* rep *-* 2 more times ch2 skip to next ch1 space, 2dc ch1 2dc ch3 sc in next ch1 space, +ch4, sc in next ch1 space + rep +-+ 8 times, ch3 2 dc ch1 2dc in next ch1 space, ch3 sc in next ch1 space, rep +-+ 9 times ch3 2dc ch1 2dc in next ch1 space* ch2 dc in next ch1 space* rep *-* 3 more times. ch4 turn

row 88: dc in first dc, *ch2 dc in next dc* rep *-* one time, ch2 2dc ch1 2dc in ch1 space of Vshell, ch3 sc in first ch4 space +ch4 sc in next ch4 space+ rep +-+ to last ch4 space ch3, 2dc ch1 2dc ch1 2dc in ch1 space ch3 +-+ to last ch4 space, ch3 2dc ch1 2dc in ch1 space of Vshell rep *-* 3 times dc in last dc ch4 turn

row 89: dc in second dc ch2 dc in next dc ch2 2dc ch1 2dc in ch1 space of Vshell ch3 sc in first ch4 space *ch4 sc in next ch4 space* rep *-* to last ch4 space, ch3 2dc ch1 2dc in next ch1 space of Vshell, ch2 2dc ch1 2dc in next ch1 space of Vshell, ch3 sc in first ch4 space *-* to last ch4 space, ch3 2dc ch1 2dc in next ch1 space +ch2 dc in next dc+ +-+ to last dc ch4 turn

row 90: dc in second dc ch2 dc in next dc ch2 2dc ch1 2dc in ch1 space of Vshell ch3 sc in first *ch4 space ch4 sc in next ch4 space* rep *-* to last ch4 space ch3, 2dc ch1 2dc in ch1 space of Vshell ch1, 2dc ch1 2dc in ch2 space of Vshell ch1, 2dc ch1 2dc in next ch1 space of Vshell ch3 sc in first ch4 space *-* to last ch4 space ch3 2dc ch1 2dc in ch1 space of Vshell ch2 dc in next dc ch2 dc in last dc. ch5 turn

row 91: dc in second dc ch2 2dc ch1 2dc in ch1 space of Vshell ch3 sc in first ch4 space *ch4 sc in next ch4 space* rep *-* to last ch4 space 2dc ch1 2dc in ch1 space of Vshell ch1, 7dc in next ch1 space of Vshell ch1 2dc ch1 2dc in next ch1 space of Vshell ch3 sc in first ch4 space *-* to last ch4 space ch3 2dc ch1 2dc in ch1 space of Vshell ch2 dc in next dc ch2 dc in last dc ch5 turn

row 92: dc in second dc ch2 2dc ch1 2dc in ch1 space of Vshell ch3 sc in first ch4 space *ch4 sc in next ch4 space* rep *-* to last ch4 space ch3 2dc ch1 2dc in ch1 space of Vshell ch1 2dc in each of next 3 dc, dc in next dc, 2dc in each of next 3 dc, ch1 2dc ch1 2dc in ch1 space of Vshell ch3 sc in first ch4 space *-* to last ch4 space ch3 2dc ch1 2dc in ch1 space of Vshell ch2 dc in dc ch2 dc in 3rd ch from turning ch. ch5 turn

row 93: dc in second dc ch2 2dc ch1 2dc in ch1 space of Vshell ch3 sc in first ch4 space *ch4 sc in next ch4 space* rep *-* to last ch4 space ch3 2dc ch1 2dc in ch1 space of Vshell ch2 sc in first dc +ch3 skip next dc sc in next dc+ rep +-+ 5 more times ch2 2dc ch1 2dc in ch1 space of Vshell ch3 sc in first ch4 space rep *-* to last ch4 space ch3 2dc ch1 2dc in ch1 space of Vshell ch2 dc in next dc ch2 dc in 3rd ch of turning ch. ch5 turn

row 94: dc in second dc ch2 2dc ch1 2dc in ch1 space of Vshell ch3 sc in first ch4 space *ch4 sc in next ch4 space * rep *-* to last ch4 space ch3 2dc ch1 2dc in ch1 space of Vshell ch2 sc in first ch3 space +ch3 sc in next ch3 space+ rep +-+ to last ch3 space ch2 2dc ch1 2dc in ch1 space of Vshell ch 3 sc in first ch4 space rep *-* to last ch4 space ch3 2dc ch1 2dc in ch1 space of Vshell ch2 dc in next dc ch2 dc in 3rd ch of turning ch. ch5 turn

row 95: dc in second dc ch2 2dc ch1 2dc in ch1 space of Vshell ch3 sc in first ch4 space ch4 sc in next ch4 space ch3 2dc ch1 2dc in ch1 space of Vshell ch2 sc in first ch3 space *ch3 sc in next ch3 space8 rep *-* 3 times ch2 2dc ch1 2dc in ch1 space of Vshell ch3 sc in first ch4 space ch4 sc in next ch4 space 2dc ch1 2dc n ch1 space of Vshell ch2 dc in next dc ch2 dc in 3rd ch of turning ch. ch5

row 96: dc in second dc ch2 2dc ch1 2dc in ch1 space of Vshell ch3 sc in ch4 space ch3 2dc ch1 2dc in ch1 space of Vshell ch2 sc in first ch3 space *ch3 sc in next ch3 space* rep *-* 2 times ch2 2dc ch1 2dc in ch1 space of Vshell ch3 sc in ch4 space ch3 2dc ch1 2dc in ch1 space of Vshell ch2 dc in next dc ch2 dc in 3rd ch of turning ch. ch5 turn

row 97: dc in second dc ch2 2dc ch1 2dc in ch1 space of Vshell, ch1 2dc ch1 2dc in next ch1 space of Vshell ch2 sc in first ch3 space *ch3 sc in next ch3 space* rep *-* 1 time ch2 2dc ch1 2dc in ch1 space of Vshell, ch1 2dc ch1 2dc in next ch1 space of Vshell ch2 dc in next dc ch2 dc in 3rd ch of turning ch. ch5 turn

row 98: dc in second dc ch2 2dc ch1 2dc in ch1 space of Vshell, 2dc ch1 2dc in next ch1 space of Vshell ch2 sc in first ch3 space ch3 sc in next ch3 space ch2 2dc ch1 2dc in next ch1 space of Vshell, 2dc ch1 2dc in next ch1 space of Vshell ch2 dc in next ch2 dc in 3rd ch of turning ch. ch5 turn

row 99: dc in second dc ch2, 2dc ch1 2dc in ch1 space of Vshell, ch2 2dc ch1 2dc in next ch1 space of Vshell, ch2 sc in ch3 space ch2, 2dc ch1 2dc in ch1 space of Vshell ch2, 2dc ch1 2dc in next ch1 space of Vshell, ch2 dc in next dc ch2 dc in 3rd ch of turning ch. ch5 turn

row 100: dc in second dc ch2, 2dc ch1 2dc in ch1 space of Vshell, dc ch1 dc in ch2 space, 2dc ch1 2dc in next ch1 space of Vshell, ch1 2dc ch1 2dc in next ch1 space of Vshell, ch1 dc ch1 dc in ch2 space, ch1 2dc ch1 2dc in next ch1 space of Vshell ch2 dc in next ch2 dc in 3rd ch of turning ch. ch5 turn

row 101: dc in second dc, ch2 work 2dc ch1 2dc ch1 in center ch1 of each V-shell across, ch2 dc in next ch1 dc in 3rd ch of turning ch. ch5 turn

row 102: dc in second dc, ch2 *2dc ch1 2dch in ch1 space of Vshell, ch1* 2dc ch1 2dc ch1 2dc in next ch1 space of Vshell, rep *-* two times, 2dc ch1 2dc ch1 2dc in next ch1 space, rep *-* one time ch2 dc in next ch2 dc in 3rd ch of turning ch. ch5 turn

row 103: dc in second dc, ch2 *2dc ch1 2dc in ch1 space of Vshell, ch1* +2dc ch1 2dc in next ch1 space of Wshell 2dc ch1 2dc in next ch1 space,+ rep *-* 2 times rep +-+ one time, rep *-* one time ch2 dc in next dc ch2 dc in 3rd ch of turning ch. ch5 turn

row 104: repeat row 100

cups: repeat directions for both sides

set-up row: attach yarn (if not attached) and sc in first 20 sts of top of lace, ch1 turn

rows 1-17: sc in each st across, ch1 turn

rows 18: c in each st across and work 18 sc down inner side. ss into lace top ch1 turn

row 19-40 sc in each sc across ch1 turn (every even row, ss into lap before ch1)

fasten off

repeat for other side

finishing:

attach yarn at mid-back anywhere. work sc evenly all alone outer edge of bottom/body at start of cups ch50 sc in second ch from hook and each ch back continue working sc up side of cup at top point ch50 sc in second ch from hook and each ch down work sc evenly down inner side of cup and up next cup to top point ch50 sc in second ch from hook and each down work sc evenly down outter side of cup ch50 sc in second ch from hook and each across, work sc evenly down side of lace and to starting sc. ss in first sc

fasten off. line if needed

enjoy!
if you found any typos/problems please email me at snugs_tracieAThotmailDOTcom so i may be able to help/correct. thanks!
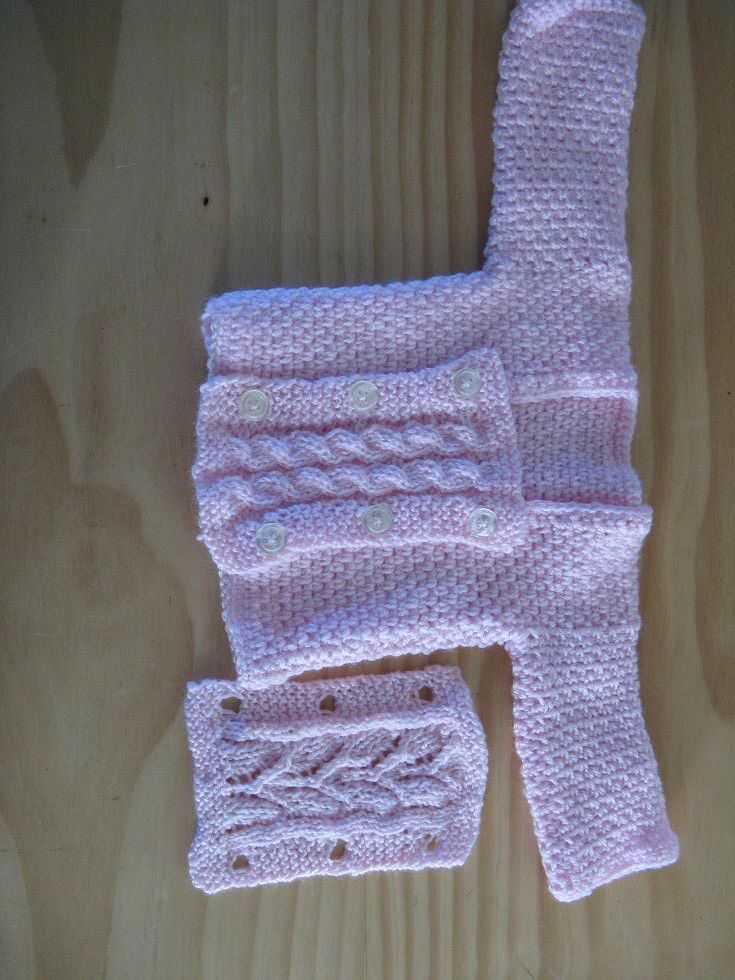
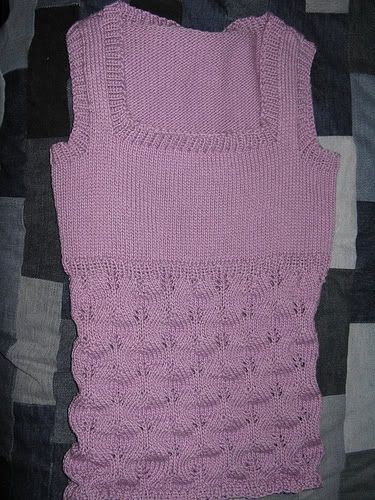
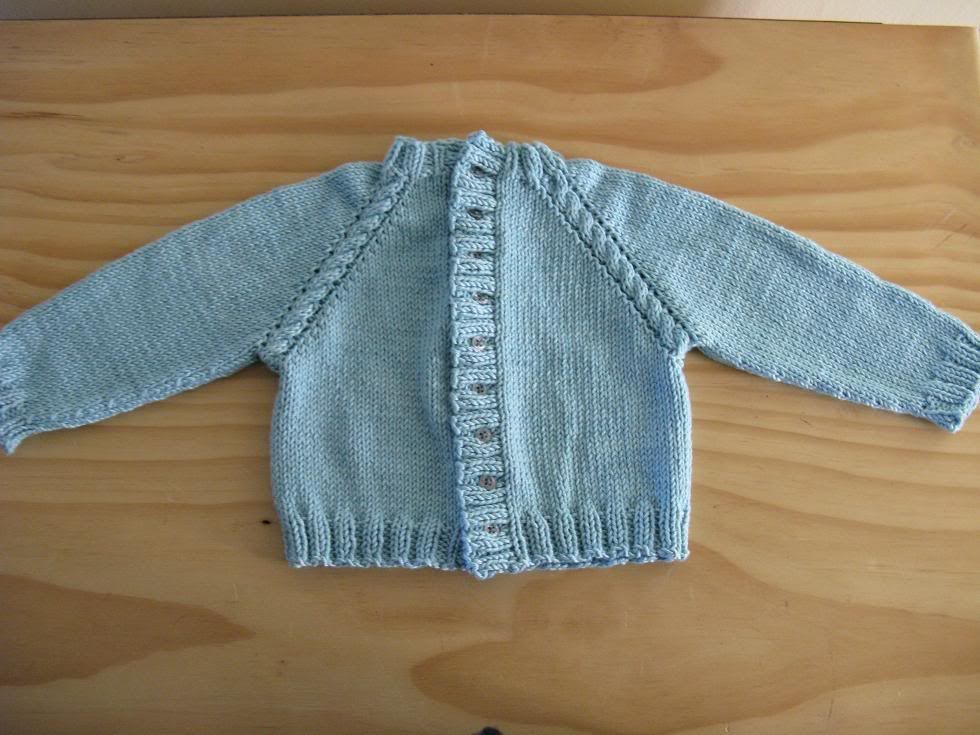
Saturday, January 12, 2008

long time

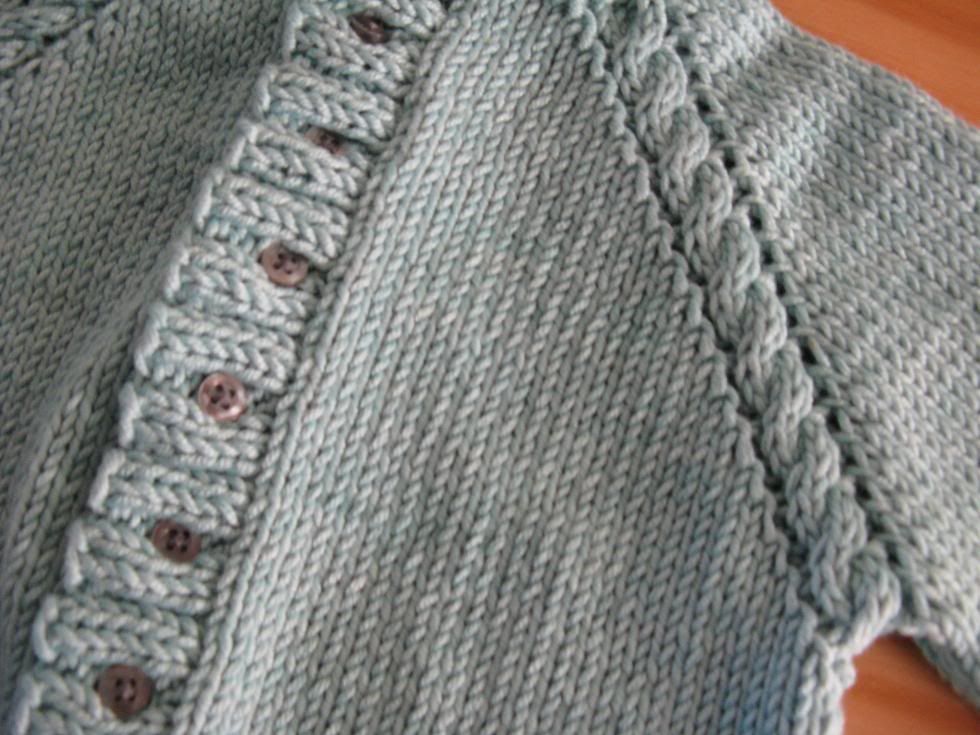
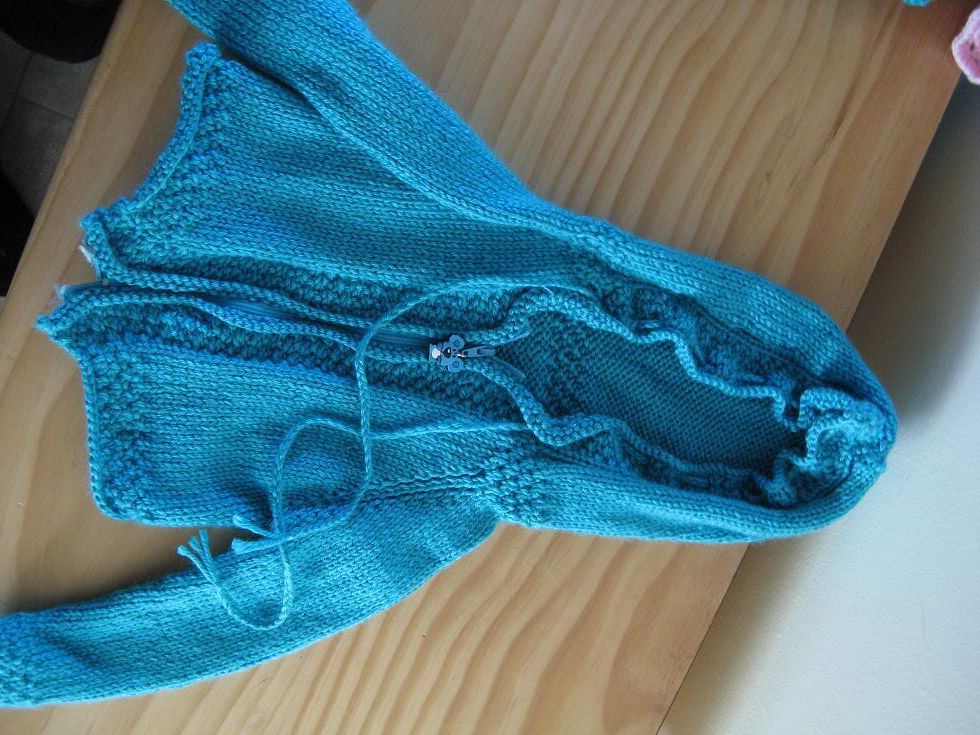
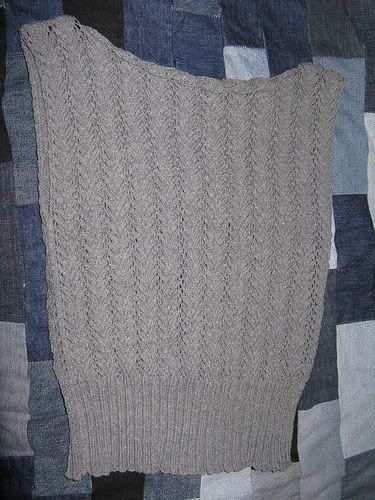
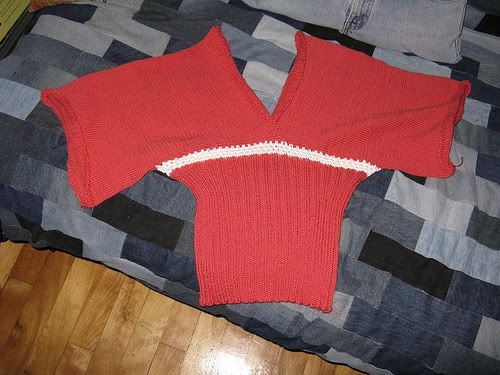
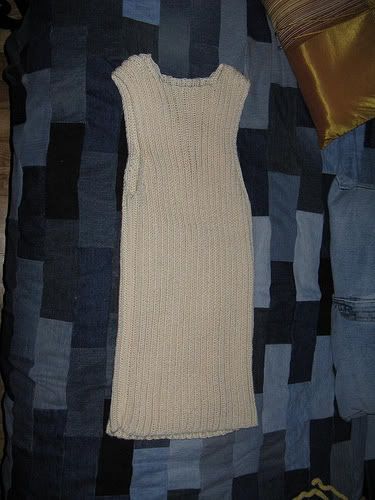
wow. the holidays were really busy this year. we have our wedding up coming in 3 months from today so we have had some of that stuff to deal with too. atleast it has been productive, i made a tank for myself (summer here i come ready or not!) hat i think turned out great. it was modeled after a ribbed turtleneck in fitted knits book but as i dont have to book and didnt find it at my local bookstore i just looked at the photos and winged it, so here it is. i used cotton-ease in taupe (light grey-ish color)


i have been working on another top for myself as of late, in black wool-ease. it has been very slow going, it is a top down raglan ribbed sweater. so far i am not even to the sleeve seperation and i am bored to tears. here it is so far, nothing to impressive and you cant see very good deffinition in it but oh well, better pictures when i get done with it.


NOW... for the big news, a great friend of mine that i haven't seen in about 3 years now. ever since i moved far away, left me a message that she was pregnant! with twins! Girls! 27 weeks! wow talk about needing to take a seat for that one! as that goes i started in right away making all sorts of goodies for her. i got 2 sweaters finished so far, i want to make one more set in a different pattern. here is the littler sweater in lavender (already finished one in pink as well but no pic yet). i also have big plans to make her a cute felted diaper bag but i have yet to start that, but i did buy the yarn. it is called sean sheep armytage, it is a single ply bulky wool and it is surprisingly soft. i hope it comes out great is all i can say.


lastly we went on a little mini-vacation/long weekend to quebec city, it was my first time there so i, of course, looked up a listing for local yarn shops. i stopped by one and will be making a grey-gina now from glampyre i think it will look fab in this lovely medium grey. i love grey it rocks


and to leave you with my end note (no pun intended!) here are some cheeks to squeeze. this is what i go with old ripped-knee jeans... make pillows to hide my yarn! slap a zipper on the top waistband and a seam o nthe bottom and bam you have a cool pillow/yarn-stash-hider


Wednesday, November 28, 2007

thanksgiving vacation is over!

we are back safe at home now after much ado. airline lost all 4 of our bags, ripped 3 when they delivered them and got the last one today. flight was worse than aweful, didnt land until 2 am! On a happier subject we had a great thanksgiving and did pretty well in the black friday dept. got all the gifts for the neices for christmas, and one for a friend. i am thinking we will host a little friends get together for christmas this year, need to talk to some people and see what plans might work for the most amount of people. my family did all our little gift exchanges while we were visiting, got and gave some great stuff.

picked up all these goodies for about 45$ at the after thanksgiving sale, i was pretty happy about that. it is 7 skeins black wool-ease, 6 skeins denim cool crochet, and 3 skeins taupe cotton-ease.

mom threw me a bridal shower while i was there, small and nice. it turned out very lovely and i had a couple friends there so it was all good. i think i will be the one planning a bridal shower here since my maid of honor was there at the first one in california. mom also helped me rehab my poor coat, i walked into a freshly painted green pole right after buying this gem. she makes felted things so she gave me some cut-out felted flowers to sew on. i think it turned out ok, i also put 1 one the leftover flowers onto the lapel of the coat to kind of tie it in and make it look less out of place

Tuesday, November 13, 2007

thanksgiving is coming!


i will be heading home for thanksgiving and i have actually finished all planned projects. can't believe i actually did this with time to spare. i am currently working on a no-brainer project of leg warmers for some 3 yr old twins. i bought some yarn to make this sweater i saw on svetlana's blog, a copy of a VS sweater and i love it. it is a lovely "rice" colored yarn that is a bamboo/silk/cotton blend and it is fingering weight and it is totally yummy.